PEACOCK FEATHER NECKLACE & EARRINGS
Hello!! everyone today i came up with the air dry clay necklace it will be suitable for kids cute little girls..this necklace makes them look more special .i like the peacock feather soo much and want to use the shape as possible as in most of the arts n crafts. Its so much fun playing with clay can make any shapes out of it and also this air dry clay doesnt need baking just make the shapes desired and leave them overnight to dry thn colour and use .For extra gloss we can use gloss medium or varnish.
Now moving on to the tutorial will gather all the supplied needed..its simple to do and fun too..
Supplies needed-Air dry clay,flat nose plier, acrylic colours(metallic),synthetic flat brush 4 and 000 brush,head pins ,loop pins,fish hooks,tooth pick,craft knife,chain hook and extension rings and finally thread /cord..
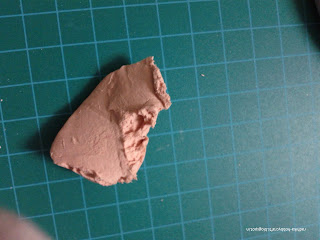
1.Take small amt of clay and store the rest of the clay in air tight container.mix the clay in hands like dough and start making round balls and make a hole with the help of tooth pick..Each time take small amt of clay for use..
3.In the same way make 7 feathers 5 for necklace and 2 for earrings..its time for painting..i uses metallic colours green gold and blue..
the feather shapes should be in gradient
4. Take hook and ring extensions now assemble the beads and feathers for necklace..take the thread and needle and tie knot to the hook and start inserting the beads one green and one gold..
insert up pto 8 beads and now add 2 feather beads and add a gold one then a feather and one more gold and 2 more feather beads..the center feather bead should be large than the side ones ..
5.Add all the beads on the other side and tie knot to the ring extensions..
now the necklace is ready
6.Now for earrings take fish hooks ,loop pins and head pins,a bead and a feather bead.for earring make a hole vertically..

insert a head pin and make a loop then add a loop pin and add the bead and make a loop and join to the fish hook..
Here is the completed necklace and earrings set..
linking it to
itsybitsy -For the kids
Hope u like it..
Thanks for stopping by..have a nice day..


wow.. looks pretty. And the colours are gorgeous!
ReplyDeleteThank u soo much EsVee.. :)
DeleteThank u lavanya..
ReplyDeleteThis is so sweet! Love the colors and design! :)
ReplyDeleteThank u Amy A..
DeleteStunning work! Love the color of it.
ReplyDeleteThank u ..
DeleteI love this the colours are amazing .This shade of blue is one of my favourites and I have lots of jewellery in this colour.
ReplyDeleteThank u Gail :)
DeleteGREAT WORK...with beautiful colours........
ReplyDeleteThank u Anuradha Prem..
DeleteThis is amazing Radhika...
ReplyDeletecolour Combo superb...
Absulately Loved it :)
Stunning creation...I jst hav no words 2 describe
Thank u soo much Kunda..
DeleteSo beautiful Radhika. You are so good at so many things and how well you explain everything.
ReplyDeleteThank u soo much Suganthi ..but not much in quilling working on it..you are the best in quilling..the fist blog i followed was yours day dreams..
DeleteIts very beautiful Radhika ,I loved the colors and the peacock feather shape! I came following from ItsyBitsy for a closer look !Thanks for sharing the steps !
ReplyDeleteThank you soo much..
DeleteMany Many Congratulations on your win Radhika!! Keep sharing and inspiring us!
ReplyDeleteThank you soooo much EsVee...
DeleteWOW How did I miss this gorgeous gs post of yours. Saw it for the first time when I saw your win at Itsy Bitsy. Seeing you explain the step by step makes it look all the more beautiful . A big congrats...Its a winner all the way!!
ReplyDeleteSo when is the party!!!
Thank you soo much Dr sonia ..ya me ready so when u want the party :)
DeleteHi very lovely. Pls clarify me how many hours does clay need to be kept for dry before painting?
ReplyDelete